Steps to create a Shopify store
To make use of Shopify and build a high-converting online store, follow the below-mentioned steps.
Sign up for a free trial on Shopify

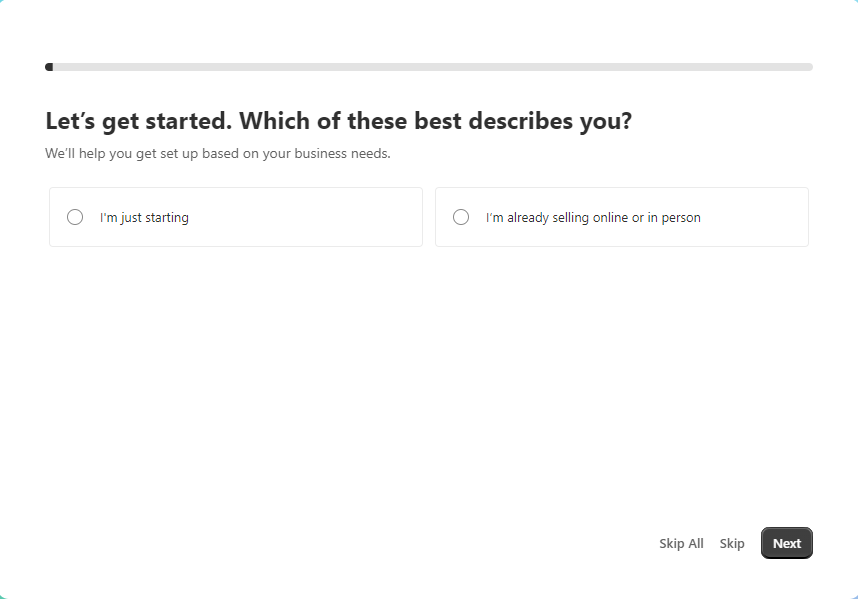
To begin with, create a Shopify account. Shopify provides a trial period for free that you may use to get started and study the platform before committing to a paid plan. Go to shopify.com/signup and provide the required information. Furthermore, if you’re having trouble thinking of a name for your shop, don’t worry; you are able to change it. For the time being, just choose something you like. Shopify will next ask you a few basic questions to tailor your next steps. As previously stated, you may always alter your opinion once you’ve answered the questions. You can also skip them. Lastly, make sure your Shopify account is safe by verifying your email address before you begin using the platform.
Know the dashboard
It is recommended that you spend some time exploring Shopify’s admin area before moving forward. Upon first login, you will be presented with a brief, four-item checklist. The tools you need to run your company are listed in the sidebar to the left. Shopify provides more choices in a pull-down menu that appears when you choose one of these options. ‘Settings’ may also be found at the very end of the left sidebar. You may make changes to your store’s name, payment information, and notification there.
Personalize the theme

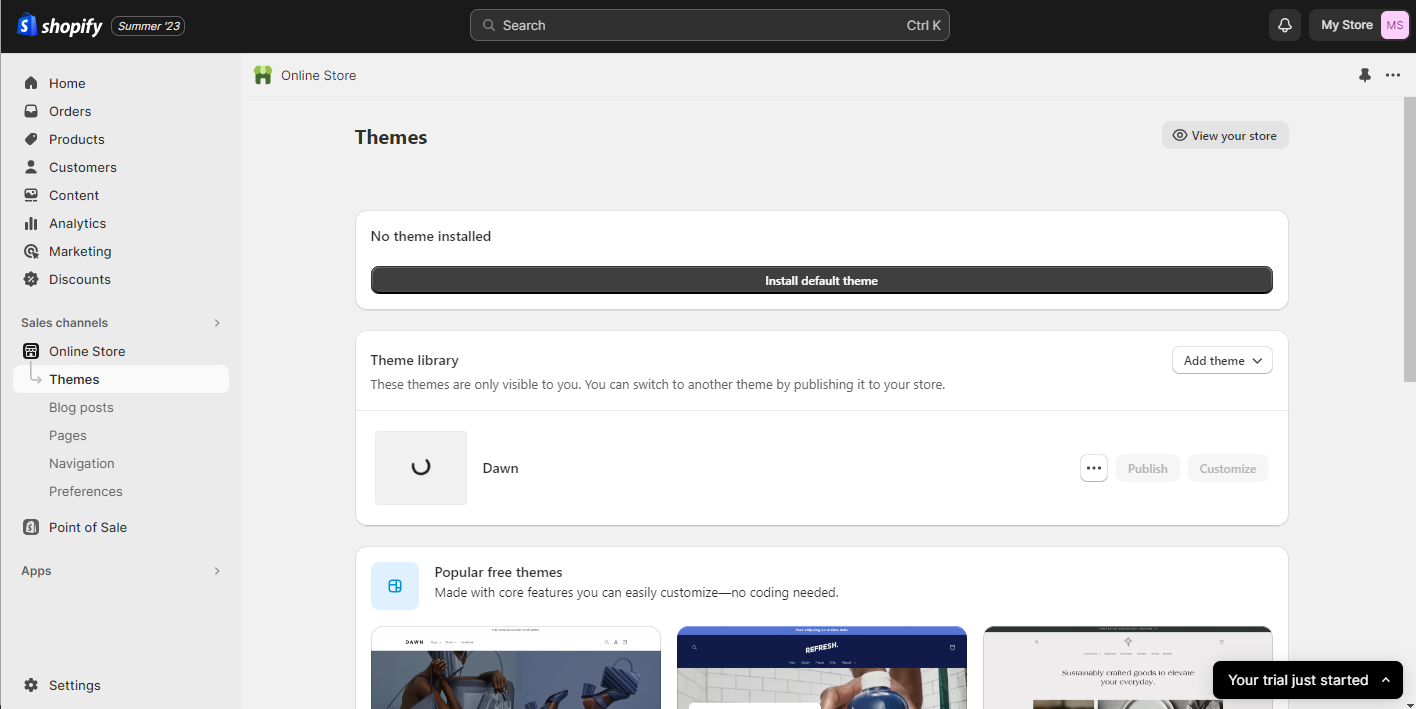
Start by going to the sidebar and selecting ‘Online Store’ followed by ‘Themes’. The ‘Dawn’ theme is ready for you to modify, or you may choose another theme from the list given. Look and try out some free templates. Install themes obtained from other resources, such as Theme Forest. In addition, if you have specific needs, you may hire top Shopify developers to assist you.
Shopify’s page editor may be accessed through the ‘Customize’ button once a theme has been installed. Modify the layout by dragging and dropping elements using the sidebar.
Add multiple sales channels
With Shopify, you can do multichannel selling through different online marketplaces. It is recommended that you establish your chosen sales channels before you begin adding items. To add one, go to Sales channels > click on + and add the channel you want to start selling on. Shopify will guide you through the steps necessary to get your various sales channels up and running.
Add your products

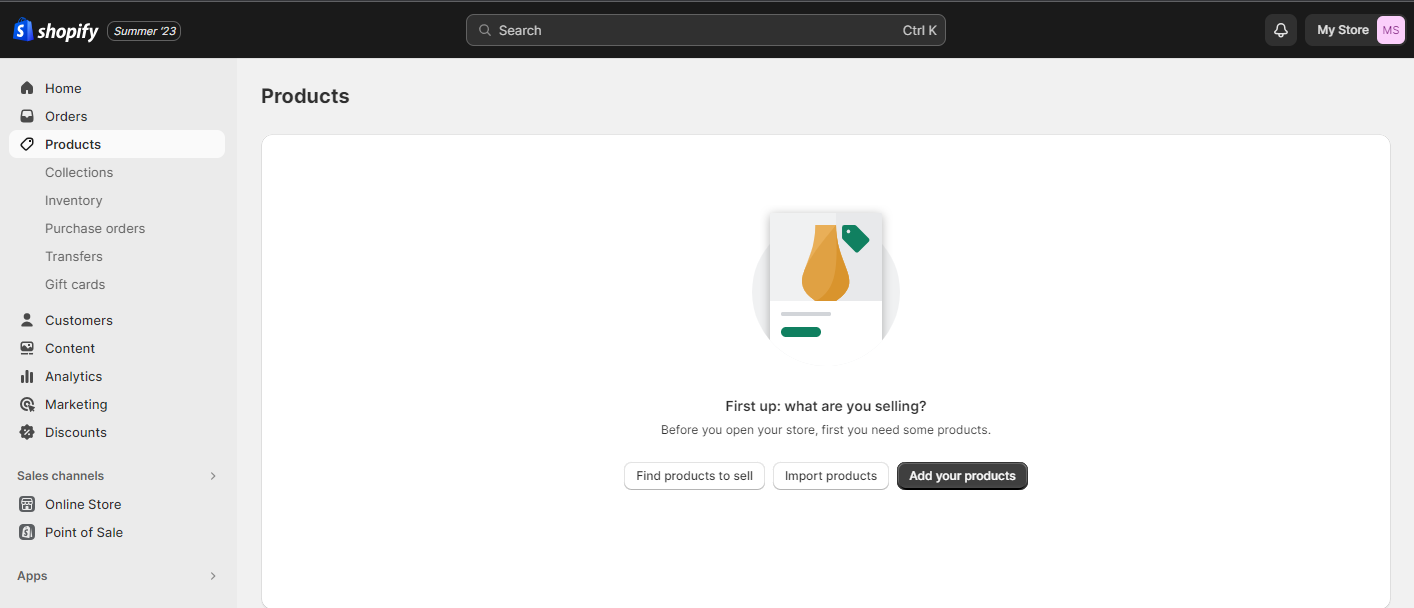
After giving your site a unique look, it’s time to start adding products. Start by selecting ‘Products’ from the menu bar, then ‘Add product’. Make sure to include all relevant product information and relevant photographs when adding a product. You’ll also find options to adjust price, inventory, and delivery, as well as pick sales channels. Lastly, save the product.
Set Payment methods
Let’s go ahead and put up your billing information now. Select ‘Settings’ from the menu that appears on the left side of the screen. You can add Shopify’s default payment method Shopify Payments or third-party payment providers. Shopify payments are the greatest option since they accept all major credit cards and debit cards. For Shopify Payments, there would be no charges on transactions.
Add Domain
In the left sidebar, choose ‘Online Store’ and then ‘Domains’. If you have a domain name registered somewhere else, such as GoDaddy, you may link it to your Shopify account using this feature. If you don’t already have a domain name you should go to obtain one. It’s easy to choose a domain name you want, select it, and then purchase it by clicking ‘Buy’.
Test and Go Live
Try to test your Shopify store by testing an order through a fake payment gateway. Check all the functionalities properly and then go live. Go to Settings > General and finish filling out the required fields. Re-enter the Settings menu, this time select ‘Shipping’, and enter the shipping prices you want to charge. Choose taxes, disable the password, and go live.
Add third-party Shopify apps
The Shopify App Store has over 6,000 applications that may assist you in a wide variety of ways, including increasing sales, keeping existing customers happy, and social media marketing. To see which applications Shopify thinks you’ll find useful, click the ‘Apps’ tab on the sidebar. Shopify also has an app store, which you may access directly.
Conclusion
Using Shopify to create and manage your online store can be a highly effective way to start and grow your e-commerce business. The platform provides a user-friendly interface, a range of customizable features, and essential tools for selling products online. By following this step-by-step guide and staying attentive to your store’s needs, you can establish a professional and successful online presence on Shopify.
FAQs
Is Shopify suitable for beginners?
How much does Shopify cost?
Can I use my domain name with Shopify?
Do I need to know the coding to use Shopify?
Can I sell any digital items on Shopify?
Ravi Bhojani is the Chief Marketing Officer (CMO) at Alian Software, where he spearheads the company’s marketing strategies and drives its brand presence in the competitive IT services landscape. With over a decade of experience in the technology and marketing sectors, Ravi has consistently demonstrated his ability to blend innovative marketing techniques with deep industry knowledge to deliver outstanding results.